How to Paint Fondant Faces using Color/Luster Dust

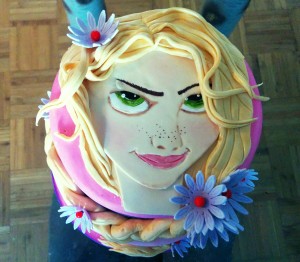
Some cake designs like the Rapunzel Cake in this post call for the use of character faces. While these faces can be printed on sugar or wafer paper and placed on the cake, it is also possible to paint your own face using fondant and color or luster dust. Color dust is very fine edible colored powder which can be used to paint fondant or various other types of cake covering. Luster dust on the other hand is a type of color dust which has some gloss or shine to it. They come in a wide range of colors from pure white to black.
An advantage color/luster dust has over color paste is that you can use a single color to get several shades of that color with a single stroke of your paint brush. This advantage is better appreciated when you are coloring fondant flowers. It is also easier to control the color spread using color/luster dust. Finally, you have a wider selection of colors like pearl white, gold, silver and bronze which you cannot get with color paste.
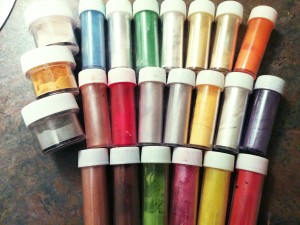
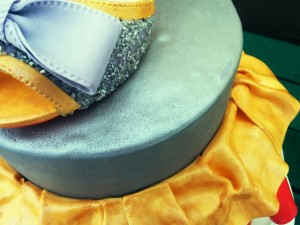
Below, I will be sharing some tips on how to paint fondant with color/luster dust using the face painting of Rapunzel for illustration purposes. For a tutorial on how to paint cake tiers using luster dust, click here.
TOOLS:
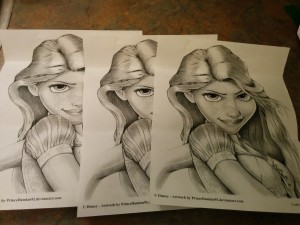
(1) Picture Printout (See Note 1)
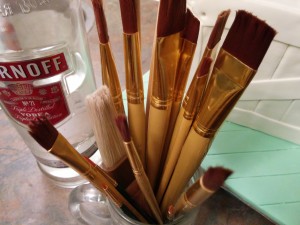
(2) Paint Brushes (See Note 2)
(3) A Sharp Blade
(4) Coloring Dishes (Any Dish/Bowl will work)
(5) Fondant Wheel
(6) A Pen/Pencil/Tool with Pointed Tip
EDIBLE COMPONENTS:
(1) Fondant. I use Marshmallow Fondant
(2) Color/Luster Dusts (See Note 3)
(3) Vodka (See Note 4)
NOTES:
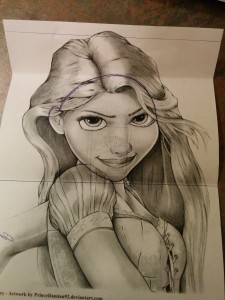
(1) The Rapunzel face in this tutorial is made in 2D. As with most of my 2D designs, I print out pictures from the web and use those pictures as a guide for my designs. You can read more about making 2D cake toppers here.
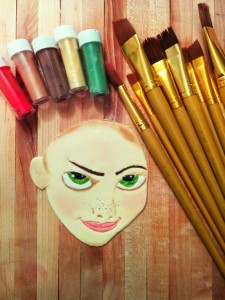
(2) You need a wide range of paint brushes with various brush tips. Each type of brush has a function which it performs perfectly. While it is always great to invest in very good paint brushes, you do not need to break the bank. You can also buy makeup brushes and use them as paint brushes (like I do).
(3) You will notice below that I will be using both dry color/pearl dust and and dust made into paste for various parts of the painting. When you need to color a large area and you want the color to be prominent, use a paste. When you need to color smaller areas or brush over areas with colors, use dry color/pearl dust. When making paste out of your dust, avoid using water. Use vodka as advised in note 5 below.
(4) Vodka is the preferred medium for thinning out color paste or turning color/pearl dust into a paste. Vodka is better than other forms of alcohol because it is flavorless, colorless and evaporates easily. Do not use water as it does not evaporate easily. Avoid alcohols which are colored or have strong flavors.
THE MAKING OF RAPUNZEL
Aside from the points shared above, other points will be given as I walk you through the making of Rapunzel’s face. You can see various views of this cake here. A tutorial on how the actual cake was made can be found here.
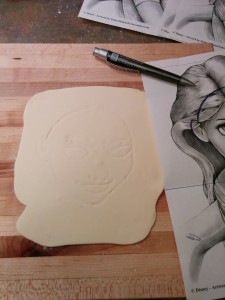
(1) The first step is to make several printouts of Rapunzel. You would need about 3 printouts of the same picture as you might need to cut into some.
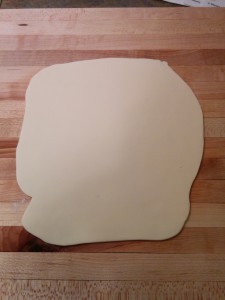
(2) The second step is to color your fondant ivory. This will form the background color for the face. If you are making a darker face, you might need to use brown in place of ivory. I used color paste to color my fondant. Next, roll out the fondant. Do not roll it out very thin as you will need to make some indents in the fondant. It is best to work with fondant which is firm. If your fondant is too soft it might drag while cutting, thereby deforming the shape of the face. I usually roll out the fondant and leave it to air dry for about an hour before cutting out the face.
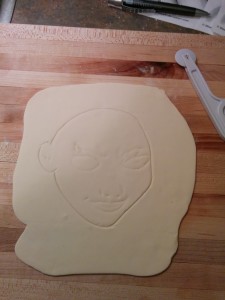
(3) Using your pen, trace out the major features of the picture on the fondant. A fondant wheel/embosser can also be used.
(4) Next, make the tracing on the fondant more legible with a fondant wheel.
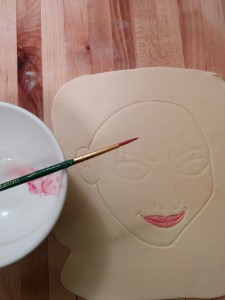
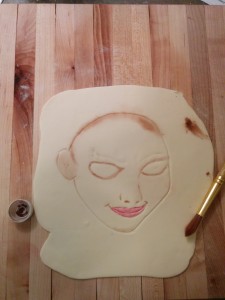
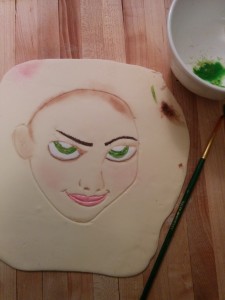
(5) Its time to start painting. For the lips, I used pink pearl dust mixed with vodka to produce striking pink lips.
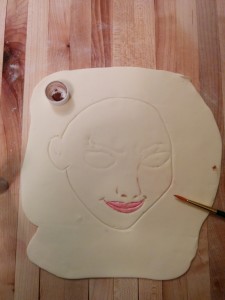
(6) Next, I used dry brown color dust and a pointed tip brush to create the outline for the nose. I also applied some to the edges of the lips for better definition.
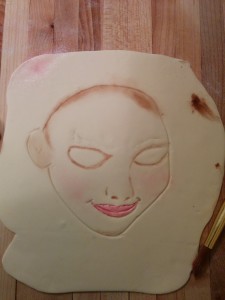
(7) Next, dry brown color dust was applied around the eyes for better definition. Using a larger brush, I applied some color to the hairline, ears and chin.
(8) Next, I applied some blush to the cheeks to give life to her face.
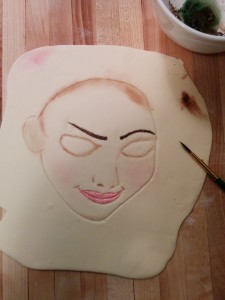
(9) Next, I made brown color dust into a paste and used it to draw the eyebrows using short brush strokes.
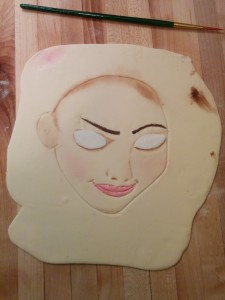
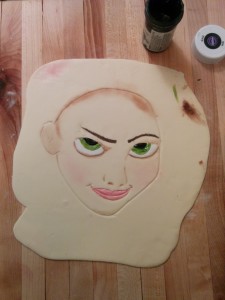
(10) Next, I started working on the eyes. I cut out some white fondant using my picture printout as a guide and placed them on the face.
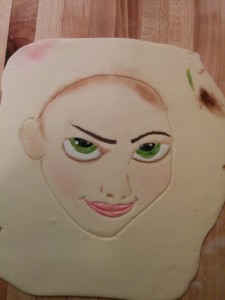
(11) Next, I made green color dust into paste and colored the iris. The pupil was colored with black color paste.
(12) Next, I placed tiny white fondant circles on the eyes to brighten them.
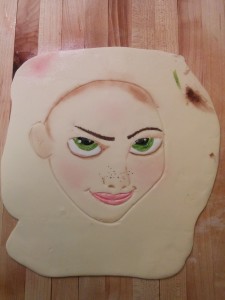
(13) Finally, I used some leftover brown dust paste to create freckles with a pointed brush tip.
That’s how the face was painted. A tutorial on how the complete cake was made along with the hair can be found here. Happy baking!

Hmmmmm! Terry thank you o.
There was a time I bought a colour dust and got confused.
Now it is very clear.
You are welcome Chinyere.
Exquisite as usual. I once made a Ben 10 theme cake using fondant all through. if I had this earlier i would have tried it. still, it is useful. Thank you, Terry.
You are welcome.
Your are just the best Mr Terry. Thanx for this lecture. Off to practice.
Thanks
I’ve learnt.thks for sharing
You are welcome Tina.
Great job bro u too much
Thanks Arinze.
This is waow
Thanks.
U are bless in d morning,afternoon n night cos of dis ura are doing.u may nt know hw useful it is for we dat are learnin frm u,bt God knows everytn n he wi surely meet u in d tym of ur nids.tanx
Thanks Buki
Whoa! Terry Adido the BOSS,#thumbsup #this is a nice job..Kudos to You
Thanks Esther
Nice and very useful tutorial.
I’m glad it helped Aisha
I got your reply
Thanks Terry
You are welcome Elizabeth.
Really love this.
U re too much.
Thanks Lara
God bless u for the lectures tanx alot.
You are welcome.
Simplified teaching. Tnk U Mr Terry
You are welcome Gift.
Thank U so much for this free-giving tutorial, I found it very essential. May God bless U real gud.
Awesome. I am glad you found it useful.
No vodka. Can I use normal alcohol? I’m having issues getting black fondant so I want to paint. Also, hope I can use gel or powder colour. Thanks.
No Vodka, try lemon extract. Any neutral alcohol will also work. Yes to the other types of colors.
Thank you sooo much Terry,
I hope to be like you someday.
Thanks Gracia.
Can i use water instead of vodca?
If you must.
Terry the makeup artist, hahaha. Beautiful tutorial, as always. For all your templates for 2D images, do you trace out the picture On the fondant first before cutting out, or you just cut out? You’ve been a great blessing to me Terry, and I appreciate you so much. May God reward your Labour of love. Hugs!!
I just cut out using the template as a guide.