The Making of a Polo Shirt and V-Neck Sleeveless Sweater Cake

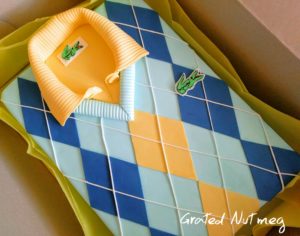
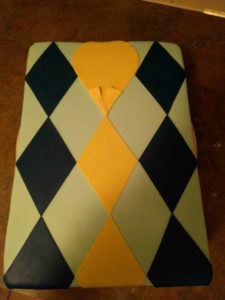
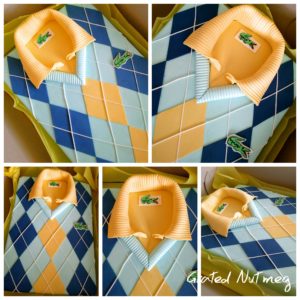
This is a tutorial on how to make the Lacoste Polo Shirt and V-Neck Sweater Cake above. This is not a personal design of mine. In fact, there are so many variations of this cake on the internet that it is hard to trace its origin. In making this cake, I used some of the techniques used in making shirt cakes with a few modifications. The most tricky and time consuming part of the design process of this cake is the collar. Once you are able to nail that part of the design, the rest is a walk in the park. To see other images of this cake, click here.
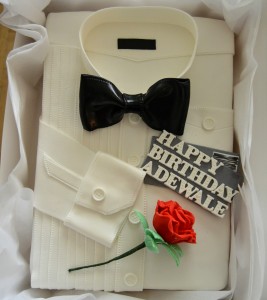
For a detailed tutorial on how to make shirt cakes like the one below, click here. The shirt cake tutorial will also help you understand some of the steps in this tutorial.
THE PROCESS:
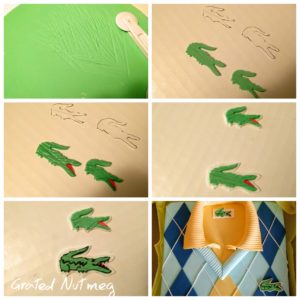
(1) First make the logo for the sweater and polo shirt collar. I chose to go with a Lacoste logo here. This logos can be made in advance and set aside until needed. To make the logo:
i. Roll out green fondant and add texture to it using a fondant wheel;
ii. Print out or trace the image of the logo and cut it to make a template. Use that template to cut out the image of the logo on the green fondant;
iii. Cut a triangular piece of red fondant and stick it to the mouth part of the logo.
iv. Stick the logo on rolled out white fondant and cut a white outline around the logo.
v. Leave the logo to dry before finishing the design with black edible marker. If you do not have black edible marker, use a pointed brush and black color paste.
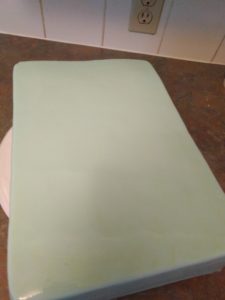
(2) With the logo out of the way, bake, frost and drape a 9 x 13 inch rectangular cake with light blue fondant. You can use cakes of other sizes to execute this design. This tutorial will however be based on a 9 x 13 inch rectangular cake.
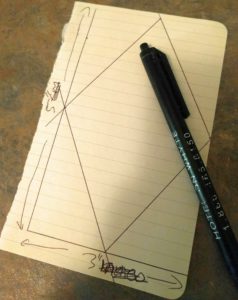
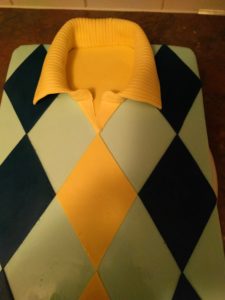
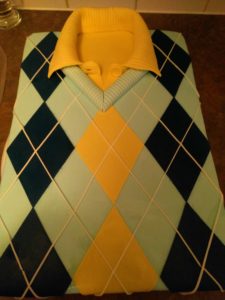
(3) Next, draw a rhombus which will be used as a template to cut patterns for the sweater. To do this, I drew a rectangle measuring 3 x 5 inches and drew lines connecting the middle of the sides of the rectangle to each other. Roll out yellow and royal blue fondant and allow them to air dry for about 30 minutes. This will give you sharp cuts. Use the rhombus template to cut out patterns using a very sharp blade. You will need 8 rhombi in total. Stick them to the cake in 3 rows leaving an empty space for the collar.
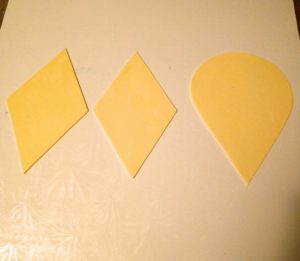
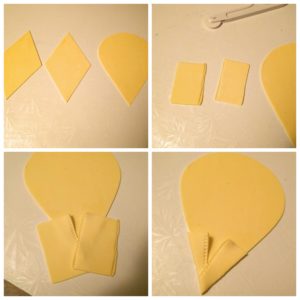
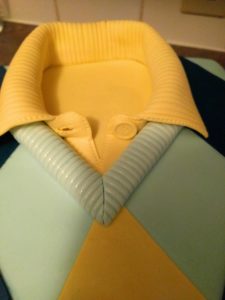
(4) Next, make the collar. This will be done in 2 parts. Part 1: Using the rhombus template as a guide, cut yellow fondant into a teardrop the same height as the rhombus. This can be done by altering the top half of the rhombus into a semi-circle. Cut two rectangular pieces of yellow fondant, stitch one side of the rectangles with a stitching wheel and stick these to the tip of the teardrop cutout to make the shirt placket. Cut off any excess fondant and stick this on the cake.
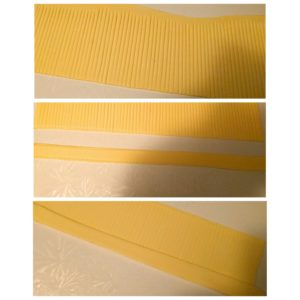
(5) Part 2 of the collar: Roll out yellow fondant into a strip of about 12 inches to make the collar flap. Using a fondant wheel, make vertical marks on the fondant. There are other tools which make this task easier. When you are done, cut the strip into a rectangle measuring 11 x 2.5 inches. Cut a thinner strip of yellow fondant measuring .5 x 12 inches to make the base of the collar and stitch the edges. Flip over the collar flap and stick the base of the collar to it. Create a button hole at one end of the base of the collar and stick the collar to the cake, making sure it aligns with the shirt placket. Stick a yellow fondant button to the base of the collar.
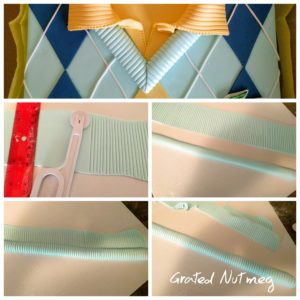
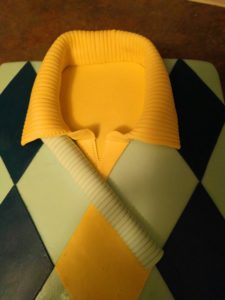
(6) Next, make the neck of the sweater. Shape blue fondant into a .5 x 12 inch log with a flat base. Roll out another piece of blue fondant about 12 inches long and make vertical markings on it like you did with the collar flap. Brush the blue fondant log with a bit of water and wrap it with the marked fondant piece. Cut out any excess fondant and divide the wrapped fondant log into 2 parts. Stick this in a V shape on the front part of the shirt collar cutting off any excess fondant.
(7) Next, make the white intersecting lines on the sweater. Using a fondant extruder, make thin white fondant threads and stick them on the cake as shown in the picture below.
(8) Finish the cake by sticking it on the cake board and sticking the logos on it.
That’s all there is to it. Happy caking!


Uncle Broda Terry, you just keep wow-ing me with ur fantastic tutorials. Just in time for me, honestly I am preparing to make my hubby’s birthday cake and he wants a cake shirt which I kinda ran out of idea. But with this, I will be wife of the year. Thanks a zillion times. I salute boss!
Thanks Mary and all the best with your creation.
I saw something like this on the internet and I wanted to know how to go about it. I was told to pay for the tutorial. Here you are giving this free!!! Wow, amazeballs. Thank you so very much. Can we send you pics when we try any of your tutorials?
I’m glad you find this tutorial useful. You can send me pics on my facebook page.
i dey speechless oga
Thanks Aminat.
Thanks for this tutorial you’re a darling..God bless you.
Thanks Becky.
Please terry, do u have any post on how to make human molds
No I don’t Portia.
I must commend you for this wonderful job more grease to your elbow my wonderful CAKE BOSS. May God continue to shower u with more knowledge.
Thanks Dammy.
Wow! This is great!
Thanks.
What is worth doing is worth doing well. You’re d cake boss
Thanks Ogugua.
Kudos to u , weldone sir
Thanks Rasheeda.
u’re a sent from heaven terry,thanks a lot. can you please tell how long should the logo template or cut out be?…thanks
You are welcome Zay, It all depends on the size of your cake. I eyeballed it.
Thanks for this tutorial.. Will definitely try this.
You are so good. God bless you for sharing.
Thanks Chioma.