Fondant 2D Gold Crown Tutorial

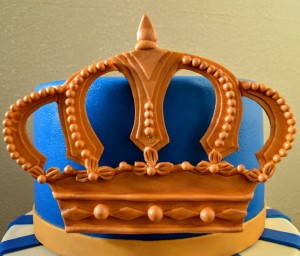
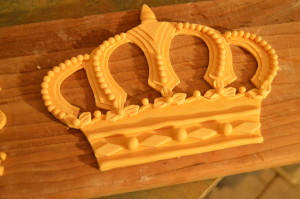
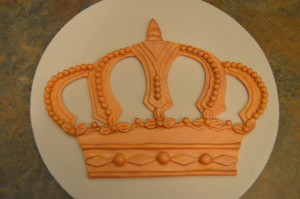
This is a tutorial on how I made the 2D Gold Crown for the Gold and Royal Blue Prince Cake below. This is a fun and exciting 2D crown with 3D elements.
TOOLS:
(1) Crown Picture Print Out/Sketch
(2) Rolling Pin
(3) Sharp Blade/x-Acto Knife
(4) Paint Brush
EDIBLE COMPONENTS:
(1) Fondant
(2) Water
(3) Ivory Color Paste
(4) Gold Luster Dust
(5) Vodka
(6) Shortening
PROCEDURE:
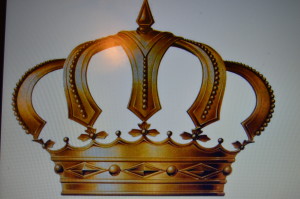
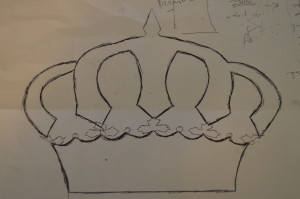
(1) Look for the picture of a crown online. I found the picture below and set out to replicate it. You have the option of printing out the picture. I simply placed a paper on my laptop screen and traced out the picture. Whichever option you choose, cut out the picture to make a template
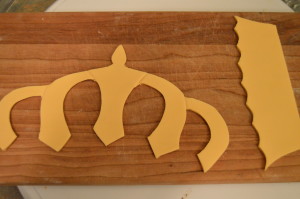
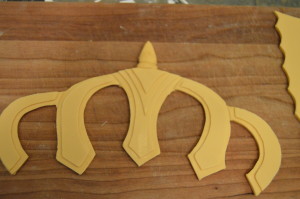
(2) Roll out ivory fondant and use your template to cut out the crown structure on the fondant. It is best to roll out the fondant and allow it to air dry for about an hour before cutting out the crown. This would guarantee sharp cuts.
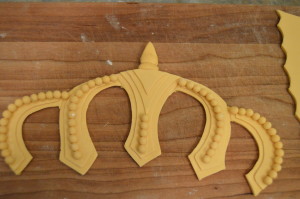
(3) With the structure in place, begin replicating elements of the crown with fondant. I started by cutting out several layers of fondant and sticking them on the crown with water to create patterns on the crown.
(4) Next, I created small pearls (Tutorial here) and stuck them on the crown. Shortening helps with rolling out the pearls.
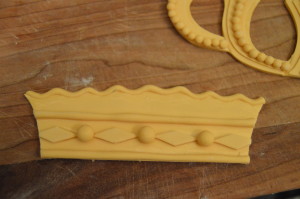
(5) Other design elements were added to the bottom part of the crown.
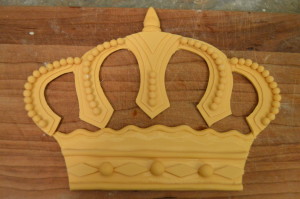
(6) The design was completed by joining both pieces together with small fondant leaves.
(7) Next, I mixed gold luster dust with vodka and painted the crown with the paste.
(8) Leave the crown to dry before sticking it to your decorated cake.


Nice work Terry. Love your work.
Thanks Joy.
How did you stick the crown to the cake? With edible glue??
I use melted white chocolate or thick royal icing (icing sugar mixed with water). I guess edible glue would also work but I have never used it before.
Thanks for showing this! Love it!!
You are welcome.