Making Fondant Letters without Molds and Cutters

Messages are an essential part of cakes. They often convey the theme of the cake or the reason for the celebration. There are several types of letter molds, cutters and impression tools which can be used to write messages on cakes. There are however times which you have to create your own letters yourself because your letter molds and cutters do not go with the look you are trying of achieve or the theme of the cake. And sometimes, you just do not have access to molds and cutters. In this tutorial, I will be sharing my method of making fondant letters using a rolling pin, ruler, blade and needle. The process is quite easy to execute. It is also flexible and subject to several interpretations. Once you get the basic method and principle down, you can play with it and let your imagination and creativity run wild.
TOOLS:
(1) Rolling Pin
(2) Sharp Blade/X-Acto Knife
(3) Needle or Pin
(4) Ruler
EDIBLE COMPONENTS:
(1) Fondant.
THE PROCESS:
This method involves the use of squares arranged in rows and columns. It uses a total of 15 squares for most letters aside from “I” which uses 5 squares and “M” & “W” which use 25 squares each. The squares are arranged in 3 columns and 5 rows and the letters are created out of this arrangement. The squares can be any size depending on how large you want the letters to be. Though squares are typically used, you can also use rectangles if that would better produce the result you want.
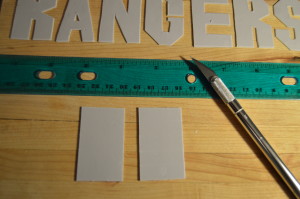
(1) The first thing you need to do is roll out your fondant as thin as possible and leave it to air dry for about 30 – 45 minutes. This will make cutting the fondant easier and give you clean lines. When the rolled out fondant is dry enough to cut without dragging, cut it into rectangles. The size of each rectangle will depend on the size of the letters you want to make. For instance, if you have chosen to use 1 cm squares for your letters, the size of your rectangles will be 3 cm x 5 cm (3 columns of squares by 5 row of squares).
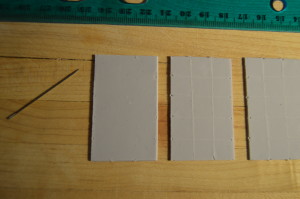
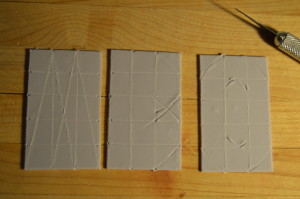
(2) After cutting out the rectangles, use a needle to demarcate the squares along the edges of the rectangles. The first rectangle in the picture below has the edges marked. I have drawn out the boxes in the other two rectangles so you have a clearer understanding of what the process looks like. When you get used to doing this, you will not need to make demarcations along the edges and use only your ruler to guide your cuts.
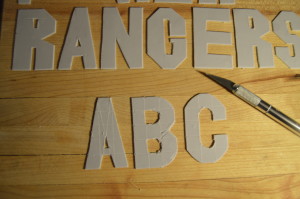
(3) Next, using your ruler and blade, cut out the letters from each rectangle. The picture below shows this process using the letters A, B & C.
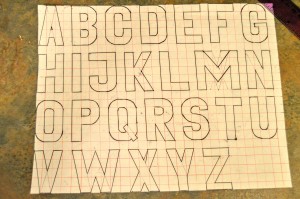
(4) You always have the option of making curves or sharp cuts for letters like C, O, B, S, et cetera. The diagram below shows the complete alphabets and how to cut them out using squares. Though I have only shown you how to make capital letters, small letters can also be made using the same process. I’d let you figure out how to do that yourself which in turn will help you master the process.
BONUS:
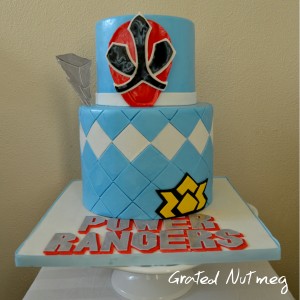
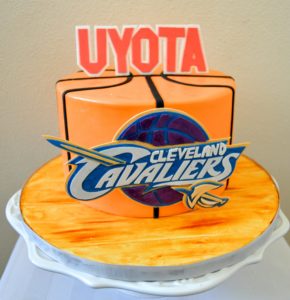
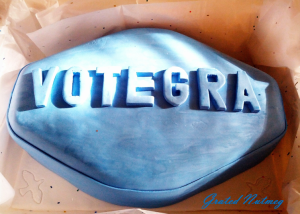
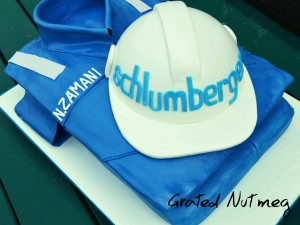
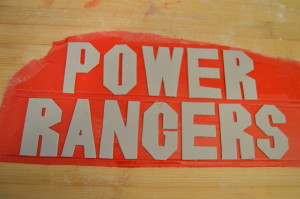
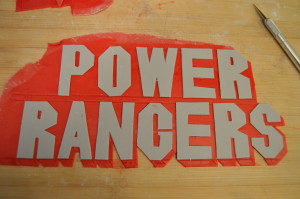
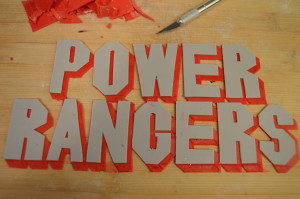
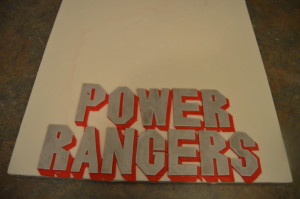
To create shadows or highlighters around your letters, roll out another piece of fondant, stick the letters to it and cut out the shadows or highlighters using your intuition as a guide and a ruler for accuracy. The pictures below document this process for a Power Ranger Cake



Thanks Terry.
This has been a concern to me.
You are welcome Chinyere.
Very nice.Terry please I need a receipe for making fondant to cover a 10″ cake.tnk u
Thanks. I do not have a regular fondant recipe.
Have been looking forward to this.You are the best Terry!!
Have a lovely Christmas.
Wish you same Liz. Thanks
Wow!!!as if u know ive been having issues wt this.tanx sooooo much
My pleasure Jummy.
u are too much sir!
Thanks Aminat.
Thanks for the tutorial. I hope I can do it. It looks technical. But I will try it out. Thanks once again
Its truly quite simple. Make sure your fondant is almost dry and your blade is very sharp. You can practice first on paper.
Ok.thanks for the tip
You are welcome.
Thanks again. I usually cut out cardboard paper of the alphabet or numbers I want then place on fondant and cut out. This appears to be neater and precise.
Thanks for the tip. I do the same wit printed letters from the web.
Thanks a lot for sharing. Have always wondered how to do this
My pleasure Blessing.
I have learnt quite alot these past few months.
U make my baking dreams come true……
Thank u soooo much T£RR¥
You are welcome.
Thanks for dis terry, u r d best. I tried it and it was simple and neat.
Awesome. Thanks for the feedback.
Beautifully done.
Thanks Barbara.
awesome! appreciated
Welcome.
Wow! These are amazing! I started making my kids’ birthday cakes (much cheaper and more fun) but have no where near your skills.
With constant practice, you are certain to outdo yourself.
Thanks Terry. This looks quite technical. I hope I’ll be able to get it right.
Its really quite simple.
WOW! Awesome sir. I’ve been searching the net for this exactly. You make baking so fun and easy. God bless you with more wisdom and higher levels.
Thank you so much.
Thanks Chinwe.
You are truly amazing with what you do. I run to your page every time I need anything and I always find something that works. Would really love to learn from you one of these days. Have a nice day.
Thanks Abisola.