How to Make Drum Cakes

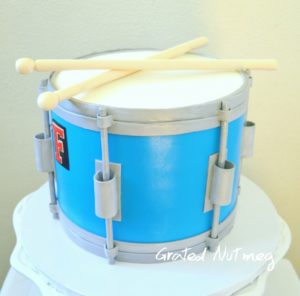
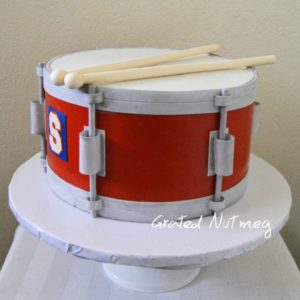
This is a tutorial on how to make fondant drum cake tiers. These cakes are great as birthday cakes for music lovers. They can be made in single or double tiers. The benefit of a double tier is that the top tier can be made in a different theme. These cakes are easy to make and can be made in a wide range of colors and designs.
TOOLS:
(1) Fondant Extruder
(2) Rolling Pin
(3) X-Acto Knife/ Sharp Blade
(4) Drying Molds (Slender Tubes)
(5) Paint Brush
(6) Ruler
(7) Fondant Wheel/Embosser
THE PROCESS:
(1) First, bake, fill and frost your cake. This step is important to determine the exact height of your cake.
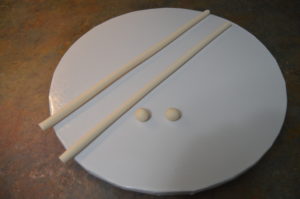
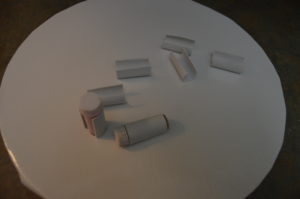
(2) Next, make the drumsticks. Roll out ivory fondant into thick sticks. Try to make the sticks as even as possible. Cut off the excess fondant. Each stick should be about 10 inches long. Also shape some fondant oblong. These will be used as the tip of the sticks. Leave these to dry.
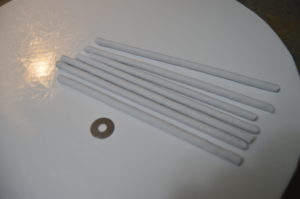
(3) Next, make the tension rods and casing. For the rods, use a fondant extruder to make thin fondant logs. Use grey colored fondant. Cut the rods into lengths which are longer than the height of your cake. The excess fondant will be cut off during the cake decorating stage. The rods should be left to dry until they can be handled without losing shape. I used the side of a ruler to straighten the logs and prep them for drying.
(4) For the casings, roll out and cut fondant into small rectangles measuring about 1 x 1.5 inches. Wrap the rectangles around slender drying molds (The 1 inch side being the length). I used Wilton Color Dust tubes as my molds here. The fondant should go half way around the mold. Cut off any excess fondant. Also make smaller casings. Leave these to dry.
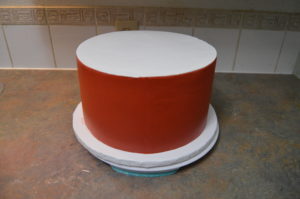
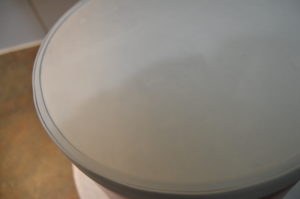
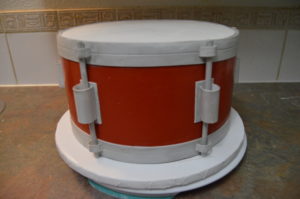
(5) Cake decorating stage. Panel the sides and top of your frosted cake with fondant. Start by paneling the sides (shell) with a colored fondant of your choice. Then panel the top (head) with white fondant. A post on how to panel cakes can be found here.
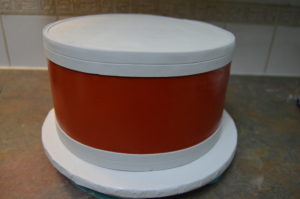
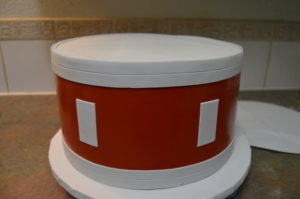
(6) Next, make the top and bottom rims using grey fondant. These are 1 inch high rims. Roll out grey fondant and divide it into 1 inch strips. Use a fondant wheel/embosser to make a mark in the middle of each rim. Stick the rims at the top and bottom of the cake.
Roll out a thinner strip of fondant (about 5 mm thick) and stick around the head of the drum to seal it.
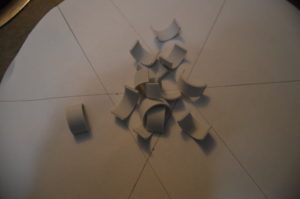
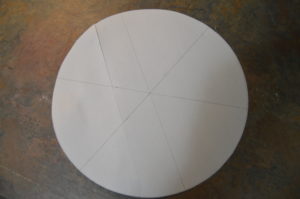
(7) Cut fondant into 6 rectangles measuring 1 x 2 inches and stick these to the shell of the cake. Make sure they are equally spaced. I used a paper circle with marked sides to help me space out the rectangles. (A protractor was used to mark the paper)
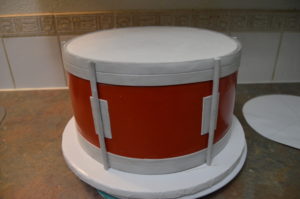
(8) Cut the tension rods into desired lengths and stick on the cake. They should be stuck to the middle of each rectangle.
(9) Cover each rod with the casing. There should be one large casing in the middle and two smaller ones at both ends of the rod.
(10) Finishing: (a) Color the grey fondant silver; (b) Make a letter tag or design of your choice and stick to the shell of the drum; (3) glue the tip of the drum sticks to the body and place on the drum. That’s all there is to it. Happy caking!


thanks for this wonderful tutorial u are real blessed terry.
Thanks Atinuke.
Thanks Terry for your selflessness.
You are welcome.
Wow, I can’t its this easy to make at first sight. Thanks Terry. God bless you
You are welcome Laurina.
God bless u terry.
Thanks Faith.
Thanks for this tutorial master
You are welcome Lauretta.
Tanx for the Good work,God bless u sir
Thanks Abigail.
Making this in two weeks time. This came at the right time,thank you.
You are welcome Maggie.
Thanks so much for sharing
Tanx,Terry,wil try it out.
You are welcome Ifeoma.
This is beautiful. God bless you.Hope to try it soon
Thanks Chichi.
Tnks for d tutorial. GOD bless U.
Thanks Vivian.
Pls what is size of d cake. i mean d width
The red is 10″. The blue is 8″.
Wow! Nice and lovely.